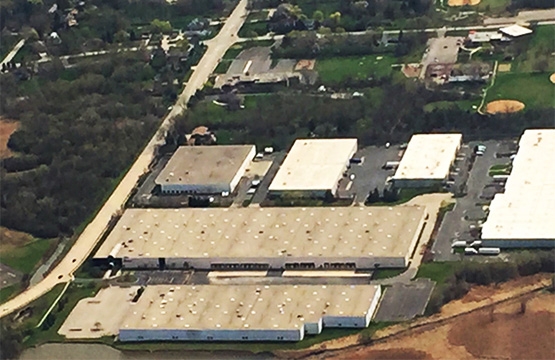
As we learned last month, one of the best times to conduct infrared inspections on low-slope roofs is often in the summer, so we thought this would be a great time to give a review of some of the basics.
 The inspection of many—but not all—low-slope roofs is fairly straightforward. If you are dealing with a built-up roof (BUR) or a “bald” single-ply membrane that has aged several years, you should have good success using one of two basic strategies in which the wet insulation reveals itself thermally due to its higher heat capacitance or its greater thermal conductivity. Ballasted single-ply roofs and newer ones that utilize low-absorbency insulation are both quite challenging to inspect. Additionally, many bald single-ply membranes can be quite reflective when using longwave infrared imagers.
In all cases, you’ll be working up on the roof, so safety is a primary concern. In our Level I Thermographic Applications course we go into detail on safety, pre-inspection, actual infrared inspection, and the post-inspection items. But plan on a preliminary daylight walk around to help you identify potential hazards and to visually inspect the roof. Day or night, on a roof it is critical to always be with a qualified escort! Especially when working near the edge of the roof take precautions to prevent a fall, observing all local approach and tie-off requirements. When working at night, go slowly as your eyes will adjust for the imager’s view screen leaving you temporarily “night blind” when looking up from the camera’s LCD screen.

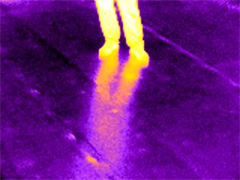
The sun provides the energy that heats up the roof. If the night is clear and free of wind (or a light wind only), you can begin the inspection an hour or two after sunset. This is when the roof has cooled to a point where the wet and dry insulation are different temperatures, due to thermal capacitance differences. The wet insulation will be identified because it is warmer than the dry insulation. The exact pattern depends upon the specific roof type. It is also important to know what kind of insulation is used and how many layers there are and to have an idea of where the leaks are occurring and give those areas extra attention when conducting the survey. The roof surface, including any gravel, must be dry.
Inspections may also be conducted during nighttime hours even when the conditions are not ideal for an inspection based on thermal capacitance. The indoor temperatures in the building must be at least 10°C (18°F) warmer or greater than the outdoor temperature. Under these conditions, heat will transfer through the wet insulation at a greater rate and these areas will also appear warmer than the dry roof due to a higher rate of conduction. Inspecting during daylight hours can be problematic and is generally not recommended.
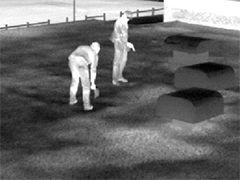 In either type of inspection, the apparent wet areas should be marked out visually with spray paint applied directly to the roof surface, numbering each section for easy reference later in a report. If necessary—and you have the building owners permission—the presence of moisture in a wet area can be confirmed with a moisture probe or core sampler. Remember to make sure to properly repair the destructive test locations. Depending upon the condition of the roof, as well as the complexity of multi-levels, and the length of the inspection window, a thermographer and helper can possibly inspect 100,000 to 200,000 square feet in a night.
Don’t worry about finding the actual leak during the inspection. It will typically be somewhere within the boundaries of the wet insulation and may be found during a daytime follow-up visit.
The investment in an inspection can pay huge dividends. If you are new to infrared thermography or haven’t performed an infrared roof inspection yet, our Level I Thermographic Applications course is strongly recommended. An ASTM standard (C-1153, Standard Practice for Location of Wet Insulation in Roofing Systems Using Infrared Imaging) describes how to conduct a roof moisture inspection and is also highly recommended reading for anyone doing this type of work.