Training Schedule
Training for Infrared and EMT professionals world-wide.


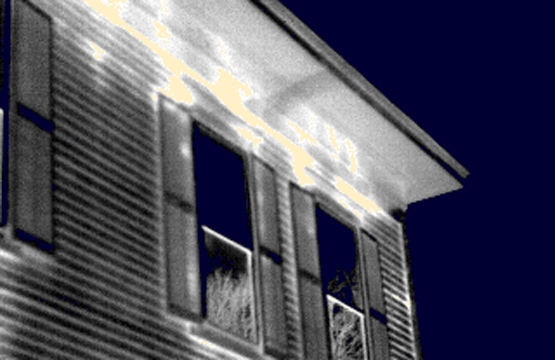
One of the most common questions we get as infrared instructors is: How do I know what camera settings to use for a building inspection? This is a good question for people just beginning to use IR for building inspections. You show up to perform a building inspection and you don’t have a lot of experience to draw from, what do you do? There are a few different methods to establish a good span and level to begin with and these will vary depending on the type of camera that you’re using.
For cameras that have both Auto and Manual modes, we recommend using the Manual mode to control your level and span settings. However, many of these types of cameras have a one-time auto-adjust function. This allows the user to tell the camera to apply a span and level setting appropriate to the temperatures that the camera is detecting at that moment, but without taking the camera out of Manual mode. To utilize this function, fill your camera’s viewfinder with your target (a wall of the building being inspected) and perform a one-time auto-adjust. This will automatically get your camera settings “in the ballpark.” Minor manual span and level adjustments may be necessary, but you’ll be close to where you need to be.
Some IR cameras do not have a Manual mode. These cameras are on Automatic span and level settings all the time. The camera is constantly adjusting the span and level settings for the hottest and coldest temperatures detected in the camera’s field of view. When looking for differences in conduction in a building, this constant re-adjusting of the camera can cause you to miss some spots. However, most cameras of this type have a “Lock” function which allows the user to lock the span and level setting at any given moment. This function can be used similarly to the one-time auto-adjust described above. Fill the camera’s viewfinder or LCD screen with your target (again, a wall or whatever portion of the building you’re inspecting at the moment) and then lock the span and level settings in place. This will keep your settings stable and will have the effect of making warm or cold anomalies more apparent.
Whether you use the lock method or the one-time auto adjust method, it is important to remember to keep all extreme hot or cold sources out of your field of view while performing the function. Including any extreme hot or cold sources will widen your span when you perform the lock or one-time auto adjust, robbing you of the contrast needed to identify missing or poorly performing insulation or subtle air leakage patterns.
Another method is to use the apparent temperature provided by your camera when aimed at a high emissivity surface such as a carpeted floor or a painted wall. The apparent temperature provided by your camera will tell you what the approximate ambient temperature is, giving you a good starting point to set the level of your camera. Minor span and level re-adjustments may be necessary. A personal weather station, thermostat, or thermometer may also be used to provide you with an approximate ambient temperature to start with.
Most building inspections require us to detect very small temperature differences. Being comfortable with manipulating the span and level settings on your camera will enable you to do this with great success. As you work your way around a building, you will be required to change the settings on your camera as rooms can vary in temperature and various parts of the building will be at different temperatures. Knowing some of the tips and tricks to attain proper camera settings will go a long way towards a successful and effective building inspection.


